Sunday, June 20, 2010

Painting Finished


I put the second coat of exterior paint on today, then left it for about 1/2 hour to get tacky, and proceeded to start removing some of the masking. I started with the interior (since it was fully cured), and re-installed the cabinet doors. The colours are a little off in this photo, because the yellow walls distort the lighting. Also, the pics were taken with my Blackberry rather than my camera, so that doesn't help.


By this point the exterior paint was tacky enough to remove some of its masking, and I was really anxious to see how the galley turned out, so I peeled off all the tape and garbage bags. I think it looks pretty sharp, although there are a couple of spots where I got paint on the stained wood, so those will have to be fixed. I think I'll try using the #000 steel wool and some varsol to remove the paint, and then I'll touch the spots up with a light topcoat of the Polyshades.

People have been asking me what I have left to do, so I made a list. Here it is.

Saturday, June 19, 2010

Primed

Its starting to look more like a finished product (or a fried egg) all the time.
Sent from my BlackBerry device on the Rogers Wireless Network

Outside and ready to paint.

Sent from my BlackBerry device on the Rogers Wireless Network

Wednesday, June 16, 2010

Inside Paint

Well loyal readers, I've been very busy lately and haven't had a chance to give you an update, until now. These photos are actually a couple days old. They show the first coat of interior paint. There is a second coat in now, and I plan to give it a third for good measure. The paint i'm using is Behr Premium Plus or something like that, and it does a fairly good job of covering the stamps on the plywood, which is something I was concerned about.

The walls also have a nice even texture, because prior to painting I spread a layer of wood filler completely over each wall and then sanded it smooth. This smoothed out the deep grain and imperfections (remember, the walls are good-side-out), without resorting to endless hours of sanding.

The colour, chosen by Laura is called "Spiced Butternut." There is a photo of a room with one wall done in the same shade here. I wasn't too keen on it at first, but I have to admit, it's grown on me. Its a very calming colour (or perhaps I'm biased, being a Psych major and all). The square thing on the floor is one of the cupboard doors, to demonstrate the contrast in the shades.

Saturday, June 12, 2010

Windows

This is what the windows look like.
Sent from my BlackBerry device on the Rogers Wireless Network

Friday, June 11, 2010

Staining

It's been a few days since my last post, and not because I've stopped working on the trailer, but because the work has been so dull that it really hasn't been worth talking about. It's been a week of wood filler and sanding, and most of the time I looked like a sugar cookie. I've said it before, but I'll reiterate.. I hate finish work. Especially paint prep.

On the bright side though, I finally started staining the galley tonight. I'm using Minwax Polyshades, which is a 2-in-1 stain and polyurethane treatment. For this first coat, I used it like normal stain, painting it on and then wiping it with a rag. This got the colour into the wood, and for the next coat, I won't use the rag. I'll just brush on a thin coat of the product and then leave it to dry. That should give it the nice high gloss, tough finish that is Polyshades' claim to fame.

The photo above really doesn't do the stain justice. I don't know if it was the lighting or what, but the stain looks much better in person than it appears above. Trust me. However, the cabinet door and top drawer did actually turn out a bit lighter shade than the rest of the cabinetry. If I remember correctly, those two pieces were cut from the same sheet of plywood. It seems, for some strange reason, like that particular sheet isn't taking to the stain the same as all the rest. I may need to put an extra coat on those pieces to even them out.

Yes, that is a bit of stain that I dripped on the upper left cabinet sliding door. I'm not worried about it, as the sliding doors will be painted to match the exterior of the trailer (gloss white).


For the cost analysis, I'll add in all the paint supplies now, before I forget how much they were worth. This includes all the sandpaper, varsol, rollers, brushes etc that I got with the paint. Even though it won't all become part of the trailer, I'm adding it in, because almost all of the items are consumable goods. Wayner, I'll leave it up to you whether the full cost of all that stuff should count.

Total Costs to Date:

Last total: $693.22
------------------------------
Paint Supplies: $230
------------------------------
TOTAL: $923


P.S. Someone remind me to take photos of the windows, I just remembered that you all haven't seen them yet.

Monday, June 7, 2010

FML

Sorry loyal readers, but there are no photos for you today. Why you ask? Well, I have reason to believe that my dog ate the micro SD card from my camera. I know it sounds like the old homework excuse, but I’m convinced that’s what happened. I was taking the card out of the camera to upload the photos from yesterday’s trailer work, when Ella the China Shop Bear jumped up and caused me to drop camera, batteries, SD card and all. She then rooted around the rubble with her nose, and as I gathered up all the dropped bits, I found no trace of the memory card. Even if I could find the damn thing after it’s been through her, I’d be surprised if it’s still functional. Not that I’d be that picky about using an 8GB turd to store my photos.

Anyway, down to business. Just because there are no photos doesn’t deny your right to kill time at work reading about my current obsession.

Saturday I didn’t get much done, I built a box to cover the cooler drawer slides where they stick into the cabin, and caulked some of the gaps in the cabin walls. Most of the day was spent retrieving an amazingly complete ’46 Chev 2-ton from a farmer in Hamiota. Dwayne can’t get over what great shape it’s in, and can’t wait to try and make it run. Prior to that though, I finally caved and went with Peter’s (my girlfriend’s father) suggestion to not muck about with fancy fiberglass and boat paint, and just use a good exterior paint. I believe it was CIL brand oil based high gloss exterior paint. Laura picked out the interior colours. The cabin will be painted a sort of cornmeal yellow, and the cabinets will be stained a dark shade, similar to the shade of the laminate countertop. I went with Minwax Polyshades (I think that’s the correct name), which is a 2-in-1 stain and polyurethane treatment. I’ve never used anything like that before, but we’ll see how it goes.

Sunday was another slow day, but I got a bit more done. I started paint prep by getting the wood filler into all the holes on the exterior.
I also scored some windows from a friend of Dwaynes. I wanted to install some small windows that would slide or pop open, but I couldn’t find any. These are a very good compromise. They are hexagonal van windows (a la 1970’s shaggin wagon) about 13” across. When I got them they had a dice design on them (see above, and use your imagination because they were much more symmetrical looking than that) , but that was easily removed by spraying them with engine degreaser, scraping the paint off with the edge of a hose clamp (couldn’t find a razor), and then buffing with a powerball and some glass cleaner. I then installed these in the doors, centered, with the points heading front-to-back, and the flat sides top and bottom. The bottom edges are in line with the door handles.
I also put a ¼-round front lip on the cooler drawer with the round edge facing out.

Thursday, June 3, 2010

Death Star

If I were Darth Vader, I would be reporting to the Emperor, "This battle station is nearly operational."Today was day one of door-a-palooza. I got the passenger side door sorted out, and tomorrow I'll do the driver's side.

I was going to try to attach some aluminum L-molding to the edge of the doors to give them a lip to close against the wall, however when I started to anneal and bend it, it didn't take long before I had twisted it into a mess. So I went with plan B, which was to build a lip on the inside of the doorframe using plywood. I wanted 1/2" sticking out, so I made the necessary pieces 1 1/2" wide.

Building the piece to fit the curve was easier than I thought it would be, since it dawned on me that I wouldn't have to try to freehand trace a piece to fit. Instead I just made a new compass. I knew that the doors had a 19" radius curve, and that I wanted the piece to stick out 1/2", and have 1" behind the wall. So I made the holes in my new compass at 20" and 18 1/2", and then traced the curve on the corner of a sheet of plywood, and carried the cut down each side. I ended up with a piece that fit beautifully. If you click on the photo above, you can see the bottom edge. I forgot to snap a picture of the curved bit.

Next came the door latch. In the top photo you can see the interior handle with the latch itself, and in the second photo you can see the exterior handle with the keys hanging out. I couldn't find any decent deals locally for this type of door latches. It would have cost about $80 for all three doors if I had purchased the parts locally, so I ordered them from Vintek. They cost $77 with shipping.

The fact that all 3 doors are keyed the same was a major selling point. The set came with 6 keys, any one of which will open any door on the trailer. I just wish the set had come with rubber gaskets to put under the exterior handle. This isn't a big deal though, I found a piece of rad hose in Dwayne's garbage bin that I can cut some bits from to make gaskets.

Total cost to date:
------------------------------------
Prev Total: $596.22
------------------------------------
(1) Sheet 1/2" plywood - $20
(3) Door Latches - $77 (I'll count these now even though they're not all installed yet.
------------------------------------
Subt: $97
------------------------------------
TOTAL $693.22

Galley Drawers


Last night was another long, persnickity job: the galley drawers. I am by no means a master cabinetmaker, but I'm satisfied with the results. I wanted a 1/8" gap around each of the drawer faces, so I used scraps of masonite to shim the faces into place when I glued and screwed them onto the drawers.
I also installed spring-roller style latches inside the cabinet doors (in the wardrobe and the galley). While I was working on this I realized that the knobs I bought for the cabinets (the same as on the wardrobe doors) wouldn't leave space for the galley hatch to close. I then cursed loudly and began thinking of alternatives. There is a gap behind the drawer fronts on the right side (beside the cooler), so they can be opened from the side, if I don't feel like putting handles on them, but I will definitely need a handle on the left-hand cabinet door. If I'm going to do that, I may want to do the same to the drawers, just for uniformity's sake.
The simplest alternative is to cut holes in the fronts using the hole saw. The other idea I had was to use they style of handles that are hinged so they lay flat against the door when not in use (like the ring handles sometimes used on steamer trunks), or I could take one of those C-shaped bar handles that are sometimes used on cabinets, overbore the holes for it, and install it with large washers behind, so that it will sit flush with the door when not in use.
Total cost to date:
------------------------------------
Prev Total: $547.22
------------------------------------
(1) Sheet 1/2" plywood - $20
(3) sets of drawer slides - $17
Cabinet hardware - $12
------------------------------------
Subt: $49
------------------------------------
TOTAL $596.22

Tuesday, June 1, 2010

More Cabinetry

I carried on with the cabinetry today. I started with the face of the wardrobe, which I cut, test fitted, marked where I wanted holes for the drawer and doors, cut again, adjusted, then installed. I then made the cabinet doors. They were cut 3/4" outside the dimensions of the holes, simply because that was the hinge offset, and I wanted an even border all around for easy measuring. I still need to make a face for the drawer. I may wait until I can get at the router in the base woodshop to make a nice face, If I can't find something else suitable. Yes, I did notice the gap where the roof meets the cabinet. It's not a big deal, I'll be putting some moulding up there anyway.


I then installed the final panel of the wardrobe, which was the top rear panel. I installed it at an angle, and it was mitered on the bottom edge for a nicer appearance from the galley.
I then put in dividers under the galley counter, and attached a 1/2" plywood door to one side using a scrap bit of piano hinge that I had cut off the galley hatch hinge. The door was warped a bit, so I stuck a piece of 1/2" plywood in the door and screwed it closed in order to take the warp out of it.

I still haven't started another sheet of plywood, so the total cost is still $547.22

Monday, May 31, 2010

Galley Cabinet/ Interior Cabinet

First off, I updated yesterdays post, so check it.


I finished off the galley cabinet tonight. It was fairly straightforward. I first removed all the clamps and weight, and checked the strength of the bond (pretty dang strong). I then cut two pieces of masonite to fit as doors (I made them 25" long so they'd overlap by an inch in the middle.) Luckily I forgot to put glue on the spar holding the top rails, because after an unsuccessful attempt to bend the masonite sheets to go into the rails, I realized I would have to remove the top rail and reinstall it over the sliding doors. I had to readjust it once more after the doors were in, because one side was too narrow, making the doors stick when they slid to that side. They're now slicker than snot on a doorknob.


Here thay are closed. the little metal finger hole cups were salvaged from the original tent trailer.


I began building the wardrobe inside the cabin. I installed a very simple drawer in the center which will work well for holding toiletries or my netbook if we want to watch a movie on a rainy day. This photo also shows one of the cooler slides in the cabin.

Total Costs to date:
--------------------------
Prev Total: 547.22
------------------------
1 sheet of 1/2" plywood - $20
--------------------------
TOTAL $567.22


Ext Skin / Counter / Cooler Drawer

Ok, here's the updated post..


The exterior skin went on fairly easily. I did it in three pieces, one on top, one on the curve, and one on the front. this was because I had to use the sheets sideways instead of lengthwise, owing to the fact that with the side walls mounted outside the floor, the camper pod is now 49.5" wide


I installed the counter, which was a 16" deep, pre-laminated shelf. the shelf was 96" long, so I'll use the other half of it for a bookshelf at home.

I also installed the rails that the sliding cabinet doors will go into. These were aluminum U-channel from Home Depot. They came in 8' lengths, which was perfect, I just cut them in half and installed 2 on top and 2 on the bottom. I drilled and countersunk one screw in each end of each rail, and used a hell of a lot of glue along their lengths to hold them in. I used a combination of Gorilla Glue (Dwayne had an old half-dried-out bottle) and Weldbond. Both products advertise that they can bond metal and wood, but just to be sure I used both.

I installed the cooler drawer using the slides I got in the surplus section at princess auto. They were originally from some kind of metal toolbox or something, so they had little tabs meant to clip them into metal. I cut those off with the angle grinder to lower their profile. Also the slides were too long for the space they went into, so I had to cut holes in the lower bulkhead and push them about 2" into the cabin. This shouldn't be an issue, they're only about 1/4" high, so they should go under the mattress with no problems, even after I build a cover for them (mainly to keep draughts (or drafts if you prefer American spelling) out. Regardless of all the modifying I had to do to make those slides work, I'm completely satisfied with them because they're very heavy duty, and will have absolutely no problem taking the weight of a fully stocked cooler.


Total Costs to date:
---------------------------------
Last total: $502.22
---------------------------------
(2) Drawer Sliders - $18.00
(2) U-molding - $10.00
(1) 16"x96" Shelf- $17.00
-------------------------------
Subt: $45
-------------------------------
TOTAL: $547.22

Thursday, May 27, 2010

Door Skin Solved / Mattress


OK, the door skin crisis has been averted. I used a new sheet of masonite and started driving in the screws from the bottom of the door (which, as it turns out, is square). Once I got the sheet screwed down almost up to the hinge, I marked the hinge's position on top of the masonite, then used the router attachment on my dremel (actually it's a mastercraft brand rotary tool) to make the cut.

I also scored a foam mattress! Courtesy of Dwayne and Richard. It's actually two mattresses, but they are each only 3" thick so I think I'll use both of them. I suspect that they are from an old tent trailer. They each are about 4'x6', so they are around 6" shorter than the cabin floor. I don't think this is much of an issue though, I'll either find a bit of scrap foam to fill in the space or just use a few extra pillows.

Total costs to date:
-------------------------
Previous total: $502.22
-------------------------
(1) Sheet of masonite - $10.00
(2) 3" Foam mattresses - FREE
-------------------------
Subt: $10.00
-------------------------
TOTAL: $512.22

Tuesday, May 25, 2010

Insulating / Hatch Skin

Well, this project is starting to tire me out. I've been working on it well past midnight every night.

Today I kept going on the hatch. Dwayne and I skinned the inside. The hatch isn't square, because the roof beam that holds the hinge isn't square, and I thought that it wouldn't cause much of a problem if I just adjusted the hatch to fit the roof beam. Wrong. I definately should have squared up the beam. The inner skin isn't flush with the hinge edge, which isn't a big deal since that'll be covered with a bit of trim anyway. However, when we tried to skin the outside of the door it was a bit disastrous. I'll have to start with a fresh sheet tomorrow. I'll attach it first at the bottom of the hatch, which is square, and work my way to the top (which is around 1/2" out), and then trim the top to fit along the hinge. Too bad I didn't fix that before it was too late.


After skinning the inside of the hatch, I finished off all the insulation. I managed to do the whole trailer using the partial sheets of polystyrene that Dwayne had lying around, and didn't even have to break into one of his full sheets. If you look closely, you'll see there's a wire dangling down near the tongue. Dwayne suggested that, even though I don't plan on wiring up any 12V electrical, it might be a good idea to run wires through the walls anyway, just in case I feel like hooking something up later. It only took about 10 minutes to run some wires along the frame, and it's nice to know that I have the option. I marked several spots on the inside where I could drill through the ceiling and get at the harness, just guessing at likely spots where I might want lights, fans, plugs etc. later.

The curves had fairly big gaps in the insulation, because I didn't feel like mitering the polystyrene to fit precisely. Luckily I planned for this and bought a can of spray-in foam insulation. I filled in all the gaps with it, and dang, is that ever messy stuff. I'll be scrubbing my hands for quite awhile trying to get rid of it.

After that came the failed attempt at skinning the outside of the door. No pictures necessary, just picture two rather wiry gentlemen trying to wrestle a sheet of hardboard into a shape and position that is not physically possible. I just hope I can manage to bodge something useable without too much fuss. ugh.

On the bright side, I'm very happy with how fast this project has been moving. I can't believe it was only about 2 weeks ago that Dwayne and I were dragging that ragged old tent trailer out of the bush.

Costs to date:

Last Total: $483.53
----------------------------

(1) Sheet of masonite - $10
Polystyrene insulation - FREE (Dwayne's stash)
(1) Can of spray foam insulation - $8.49
----------------------------
Subt: $18.49
----------------------------
TOTAL: $502.22


Monday, May 24, 2010

Discussion topics

Good Day Loyal Readers,

Now that I've got the comments enabled, here's a discussion topic for you all. I'm looking for some suggestions for a few up-coming bits of this trailer. I know I could just order the bits from the sites I'm linking here, but I'm looking for suggestions as to where I might source these parts locally (and preferably used/salvaged). I've asked the local RV dealers about these items. They can order in windows of any size for me (pricey), and the door latches they didn't know if they could get.

First, I'm looking for some door latches like this, or this. Since the doors will simply be the 3/4" ply pieces that I cut out, I need something that will mount well to them. You'll notice the handles pictured are the same kind most hardware stores sell for garage doors.
The inside latches, however, are very tricky to find, surprisingly. I like how they screw onto the inside face of the door, rather than mounting in a hole in the door, as is common in modern campers. I've seen these inside latches used in tractors, truck caps, and old campers, but have had no luck tracking any down that I can use in the teardrop.
Also, if any of you know where I might be able to find a set of handles like the ones pictured (or even 3 T-handles) that are all keyed the same, that would be very handy.

Second thing is windows. I'm looking for small windows that will mount in the doors (preferably), and that can either slide or crank open to let air flow through. the doors are 30" wide by 36"tall, so anything going there would have to be well inside those dimensions. Here are some examples: Slider, Crank, Flip-up boat window, maybe an old ext. cab truck window, who knows?

Any suggestions gratefully accepted, including different parts that might do the same job.

Cheers


Rear Hatch


Today I started the hatch door. To begin I traced out the rear curve on a paper template, which I used to make the first beam out of 1/2" plywood. I then used the first beam as a template for all the others. I cut 7 beams.

I then clamped all 7 together and sanded the edges so that they were even.

This is the frame. I doubled up the plywood on the outside beams, so they are 1" thick.


While I was working on the hatch frame, Dwayne started insulating the roof with polystyrene insulation. He had some 1" thick sheets of it left over from when he insulated his garage. Once I finished the hatch frame, he helped me test fit it and its hinge. It sits very nicely in the rear opening, and moves well too. It binds very slightly at the bottom corners when closing, but I should be able to solve that fairly easily with the sander.

Ella tried out the cabin. I think she approves.

Costs to date:

Last Total: $462.54
----------------------------

(1) Sheet of 1/2" ply - $20.99
2x2's - FREE (I ran out, so Dwayne donated a few 2x4's which we ripped to 2x2)
polystyrene insulation - FREE (also from Dwayne's stash)
----------------------------
Subt: $20.99
----------------------------
TOTAL: $483.53

I also noticed that so far there has been very little scrap accumulating from this project. Most of it has come from the hatch. I had to space the beams out about 1" from one another on the sheet of plywood, so there are a lot of crescent-shaped bits of plywood scrap. Still, there is probably less than half a trash bin of total scrap so far. I think this is a testament to just how economical the design really is.

Comments Enabled/Email Posting.

Hi Loyal Readers,

I figured out how to enable comments on the blog, so you can now leave comments at the bottom of the page, or click where it says "comments" to leave them.
I also discovered that I can email posts from my Blackberry (and thus, straight from the jobsite). So you'll now be kept more up-to-date than ever before.
Sent from my BlackBerry device on the Rogers Wireless Network

Sunday, May 23, 2010

Doors, More Framing, Headliner

I started off the day by marking and cutting out the doors. As you can see, I kept the same rounded profile as the generic benroy plans from the first post of this blog. The curve on the door is a 19"radius, the same as the front curve on the roof.

I'll answer the question before you ask it: Why yes, that is me cutting into a plywood wall using an angle grinder. I wanted something that would cut a narrow, linear hole to start the jigsaw blade. I'll be using the same pieces of plywood I cut out as the actual doors, so I didn't want any big round gouges in them to leak. The cutoff wheel on the angle grinder worked very well, despite making a lot of smoke.


Next on the docket was framing the roof vent I picked up this afternoon at Canadian Tire. This was fairly straightforward.


The plywood walls were warped a bit, and not sitting plum at the front. They also weren't as stiff as I would have liked, so I put in some diagonal braces. I had to give myself a refresher trigonometry lesson to get the angles right, but they fit like a glove. They also brought the whole thing back to plum, and made it stiff as hell.


I carried on with the remainder of the roof beams, and added a couple along the centreline running fore-aft.


As darkness fell, I enlisted the help of Nathan (Dwayne's son) and his friend. The extra hands were helpful jamming the masonite headliner into position. As it turned out, the top of the roof was about 47 15/16" rather than a full 48, so it was a very snug fit, and the masonite held itself up. screwing it to the roof beams proved to be a pain in the rectum, as the screws don't seem to have quite as broad a head on them as the masonite would prefer. Regardless, I got it in before Wayner called to invite me to go find a brand spanking new geocache with him.


Sorry about the poor quality photos of the headliner. It was dark, the camera flash wasn't cooperating, and I was in a hurry to go geocaching.

Tomorrow I plan to lay a good thick bead of glue between all the roof braces and the headliner, because the screws could potentially wear through the sheet.

The 4x8 sheet just happened to go all the way to the back of the cabin. Handy. It's almost like I'd planned it that way.


Costs to date:

Last Total: $376.50
----------------------------
(4) 2x2's - $4.54
(1) Sheet of Masonite - $10
Roof Vent - $54.50
Screws - $17.00 (this is about how many I'll use by the end of the project. I'm adding them in here so I don't forget)
----------------------------
Subt: $86.04
----------------------------
TOTAL: $462.54

Saturday, May 22, 2010

The Camper Begins


This Friday I got started on the camper pod! Exciting. Read on...


I started building the floor after being let off work early. My friend Wayne came and helped out for awhile. We glued and screwed 2x2 joists under the 3/4" plywood floor. I used the handy countersink bit above to drill the pilot holes. As you can see above, the glue was Weldbond (which I've never used before, but I hear it's pretty decent) and the screws are 1-1/4" deck screws.


Above is what the underside of the floor looks like.


Wayne and I traced and cut the walls that same afternoon. We used a compass made of a piece of the 2x2. I drove a screw through at one end so that about 1/8" of its point was sticking out, then drilled pencil-sized holes at 19" and 48" from the point. The front curve is the 19" radius and the back curve is 48" radius at the top and 19" radius at the bottom so that it meets the vertical rear nicely.


The two photos above were shot on Saturday back at Heavy Pedal. It was raining, so I brought the whole project there so that I could have a dry place to work on it. Not quite soon enough apparently, because the sheet of 1/2" ply that was on the top of the stack the previous night when the rain began had started to delaminate on one end. I'll use that sheet for cupboards in the galley, as only about 5 or 6 inches of it are ruined.

In the two photos above, the walls are clamped together because I had just taken the belt sander to the curves to even and smooth them out. I bought the sander and a 5 amp jigsaw with a laser at Canadian Tire on sale. They were both about 50% off. It turned out to be cheaper than renting them for the long weekend.


Next step was to fit the walls. I fit them to the sides of the floor to maximize both interior space and overall strength. They were glued and screwed in the same fashion as the floor, except that about every second screw was longer. Dwayne found some longer deck screws and invited me to use them just to be sure the walls were anchored guten'tight (like a German virgin) to the floor. I then installed two spars across the top to steady the works. I didn't put any more in yet, because I wanted to keep as much space clear as possible while I decided on the measurements for the cupboards in the galley.

After taking a short break to go for a nice drive (see below), I installed the lower bulkhead. I became a yardstick for this step, using my own length to determine the amount of galley space I could have. I laid on the floor and stretched out to see how far aft I would need to go with the bulkhead.


The one feature I really wanted to have in the galley is a drawer for a cooler to sit on under the counter, so that the cooler can be pulled out and opened, then re-stowed easily. Since I'm very tall, this was a challenge to incorporate into the plan (see above paragraph about the lower bulkhead). Luckily Dwayne and Tasha were nice enough to donate this great antique Coleman cooler to the cause. It's narrower and taller than most coolers, so it fit the bill perfectly. Plus it dates nearly back to the heyday of this type of camper, so I think it's a great addition.

Costs to date:

Last Total: $260
(I'm not counting the box sides since they have nothing to do with the camper)
------------------------------

(3) 3/4" plywood sheets - $89.97
(6) 2x2's - $13.62
(1) Weldbond Glue - $10.41
(1/2lb) Deck Screws - $ 2.50
------------------------------
Subt: $116.50
------------------------------
TOTAL: 376.50


Bonus
This is what kept me from the trailer all afternoon. I don't regret it one bit. Dwayne and I were feeling a bit mischievous with all the rain coming down, so we figured it was a fine time to fire up the Eagle and take 'er down to the clay pits for some muddin'


:-0

Wednesday, May 19, 2010

Day Off (-ish)

Well, I think this is the first day since the project started that I haven't done any actual work on it. I did, however, go pick up most of the lumber that will become the camper pod. This consisted of 4lbs of deck screws, some Weldbond glue (I was going to use Gorilla Glue, and still might, but I'll have to go to Canadian Tire or Home Depot for it), some 3/4" Plywood, some 1/2" plywood, some 2x4's which I had ripped to 2x2's, and some sheets of 1/8" masonite.
Yes, I'm going old-school and using masonite to make the curved roof just like they did back in the 30's-50's. Now I know what you're going to say: "That's a dumb idea, that s***'ll rot out so fast it'd make your head spin." Well, no worries, this was well thought out...

1. Plywood contains glues that are water soluble (to varying extents, based on the quality of the plywood). Masonite is just wood fibers that are formed into sheets by applying huge amounts of pressure. This causes the natural resins in the wood to bind it together with properties similar to solid wood. This leads me to believe that masonite would weather fairly well.

2. Since plywood bends along the short side, rather than the long, using 1/8" plywood would mean that a great deal of it would go to waste. I can bend the masonite sheets lengthwise, so there will be very little waste.

3. The masonite sheets cost me about $10 each. 1/8" birch plywood would have cost around $30 per sheet (and don't forget, as above, I would have needed more of them).

4. I priced out some epoxy boat-hull paint/sealant. It goes for $55/quart. Yes, this is pretty pricey, but it's the stuff that people use to seal the hulls of super-light kayaks and surfboards they build out of bloody balsa and foam. I'm confident it'll do just what I need it to.

5. If it was good enough for the old timers who started the original teardrop trailer craze, it's good enough for me.

6. If my roof starts to leak or rot out, I can easily tear it off and build a new one next season if necessary.

I'm sure some of you still think I'm being silly using "inferior materials" but that's the joy of building things yourself. You get to ignore what everyone else wants and do your own thing.

Also, I've started corresponding with Vintek RV Parts. They specialize in parts for teardrop trailers. I'll be buying a galley hinge, a set of door/hatch latches keyed alike, and a set of 21x14" windows from them.

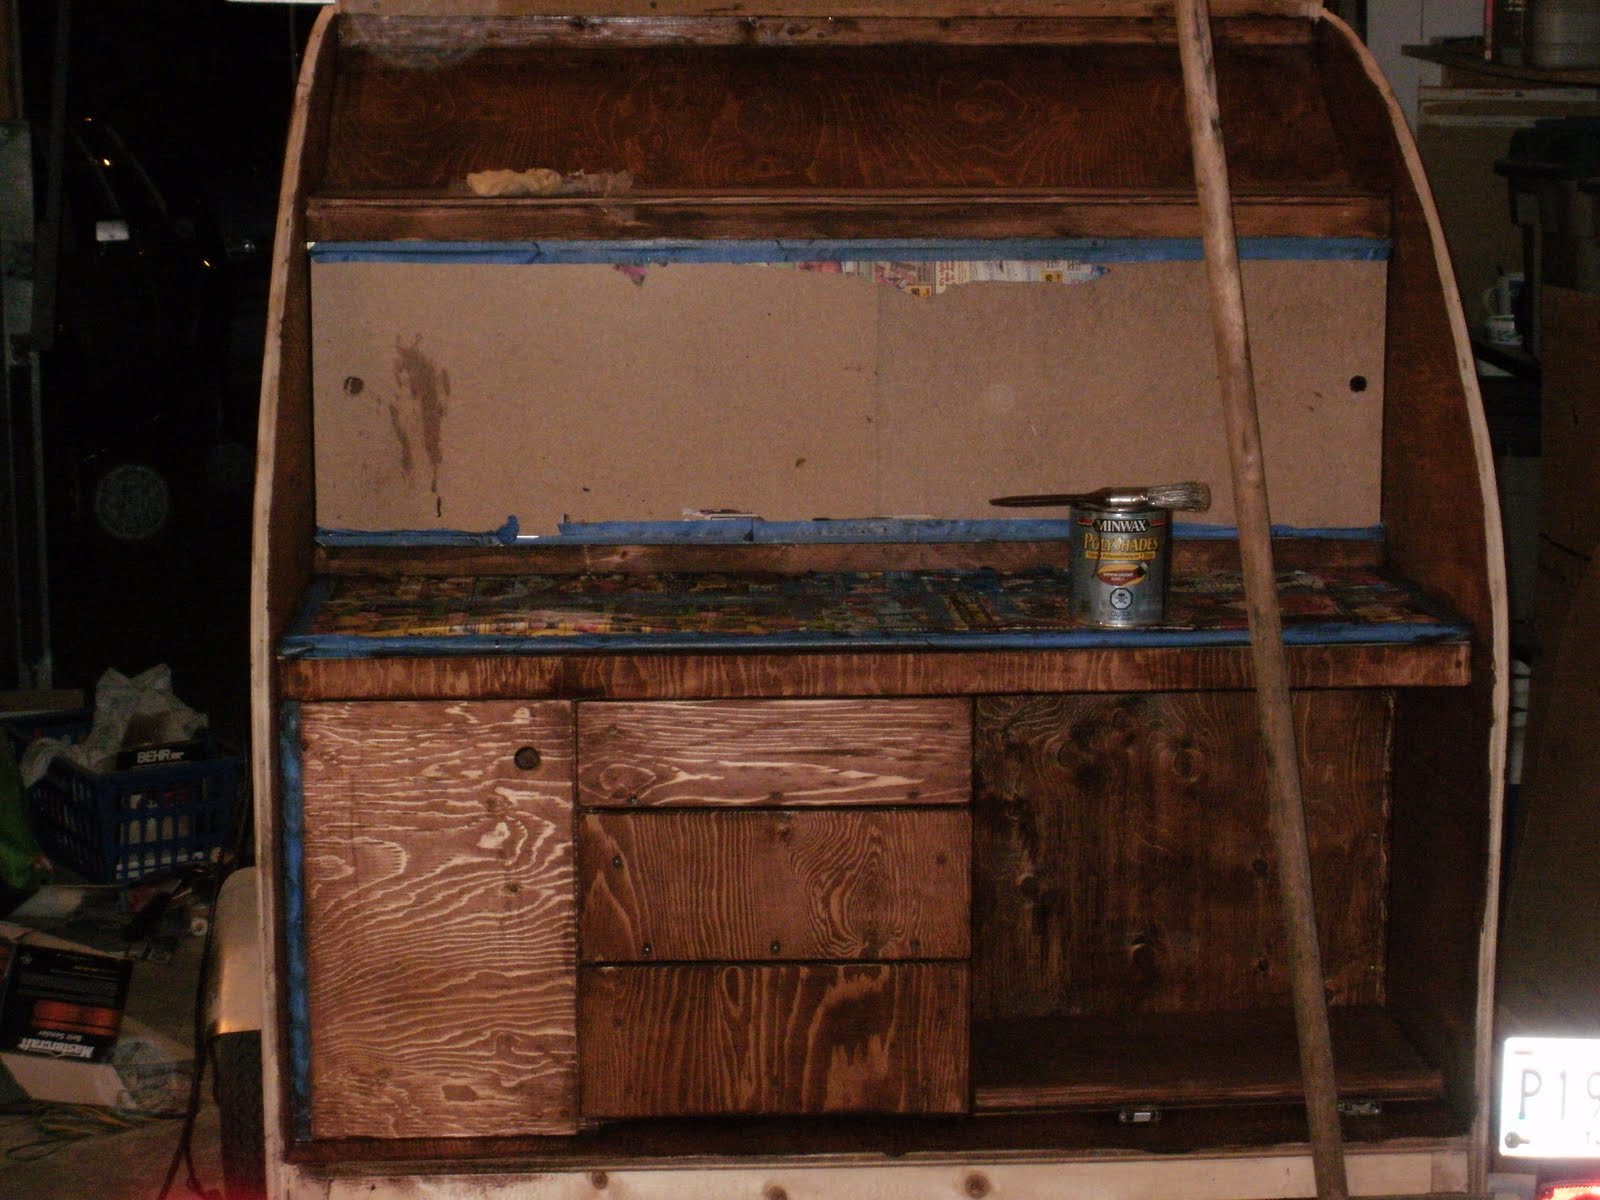
Once I get all of the supplies I've mentioned above (including lumber, hardware, boat paint, and RV parts) the total bill for the trailer will be somewhere in the $850 range. I'll add it more precisely as I build, since I'm not going to count any extra bits that I don't end up using. There are still a few things I'll need that aren't on this list, like insulation, paint for inside the cabin and galley, some kind of a countertop, cabinet hinges, knobs, etc. I'm still confident that I'll be able to stick with the $1000 budget, but it's not my top priority. My top priority is creating a decent quality mini-RV that I'll be able to enjoy a lot of use of.

Now hopefully I can get into the wood shop to drop off this load of lumber, and get to work on it.

Tuesday, May 18, 2010

Box Sides


Yesterday and today I slapped together the box sides for the trailer. I started by building the sides themselves at home. The photo above is the first one test fitted. I couldn't find any neighbours to borrow a power saw from, so I used my trusty Stanley FatMax handsaw, which cuts very quickly and easily (and also has a 90/45 degree beveled handle so it can be used as a square).

I then went to Heavy Pedal Ranch while everyone was away at school/work and started cutting and welding on the pieces of box beam for the stake pockets. I initially welded just the two sides of each, but Dwayne came home and suggested I weld across the top to keep moisture out from between the pieces, so they wouldn't start to rust out as quickly. As you can see, my welding doesn't suck quite as bad is it did.

After work today, the base Wood Hobby Club decided to have an open house in conjunction with the reopening of the auto club. I used this opportunity to buy a membership and rip the bottom ends of the stakes to they'd fit in the pockets, since the box beam wasn't big enough to accept a full 2x4. I unscrewed all the planks, ripped the 2x4's with the bandsaw, and reassembled the pieces. The vice-prez of the wood club happened to have some exterior wood treatment, and gave me some to treat the cut ends of the planks, so they should stay nice and rot-free for a good long while.

After this photo was taken I also painted the stake pockets and a few spots that I cleaned up with the grinder where I cut off bits of the original frame.

I'm not sure what colour I want to paint the wood bits yet. I'm thinking maybe forest green? Send me your suggestions. What do you think would look good over the silver frame? Possibly just some clear varnish?


And once again I've gone and lost the reciept. Here's my close estimation..

Last total: $260
--------------------
2 10 foot 2x4's - $2.50 ea
6 8 foot 1x6's - $3.00 ea
-------------------
Subt: $23
-------------------
Total: $283 (though I'm not sure if this lumber really counts since it's not actually part of the camper)

And a bonus for those of you who really have nothing better to look at...

This was my Sunday project. My headlights were very badly faded, and this was irritating me to no end, so I picked up a 3M Headlight Lens Restoration Kit from Canadian Tire, and it worked wonders. One of the guys at work noticed and thought I had installed brand new headlights. This picture doesn't actually show the full effect of the kit. After I did the drivers side light the first time, it was still a bit cloudy. I reread the instructions and saw where it stressed the importance of rough sanding until seeing an even frosted look over the whole lens, which I hadn't done. I redid the light before moving on to the second one and it looked brand new. I wish I had remembered to take another photo. If any of you really want one, I can snap another pic later.