This Friday I got started on the camper pod! Exciting. Read on...

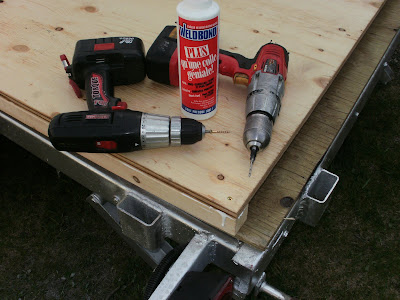
I started building the floor after being let off work early. My friend Wayne came and helped out for awhile. We glued and screwed 2x2 joists under the 3/4" plywood floor. I used the handy countersink bit above to drill the pilot holes. As you can see above, the glue was Weldbond (which I've never used before, but I hear it's pretty decent) and the screws are 1-1/4" deck screws.
Above is what the underside of the floor looks like.
Wayne and I traced and cut the walls that same afternoon. We used a compass made of a piece of the 2x2. I drove a screw through at one end so that about 1/8" of its point was sticking out, then drilled pencil-sized holes at 19" and 48" from the point. The front curve is the 19" radius and the back curve is 48" radius at the top and 19" radius at the bottom so that it meets the vertical rear nicely.
The two photos above were shot on Saturday back at Heavy Pedal. It was raining, so I brought the whole project there so that I could have a dry place to work on it. Not quite soon enough apparently, because the sheet of 1/2" ply that was on the top of the stack the previous night when the rain began had started to delaminate on one end. I'll use that sheet for cupboards in the galley, as only about 5 or 6 inches of it are ruined.
In the two photos above, the walls are clamped together because I had just taken the belt sander to the curves to even and smooth them out. I bought the sander and a 5 amp jigsaw with a laser at Canadian Tire on sale. They were both about 50% off. It turned out to be cheaper than renting them for the long weekend.
Next step was to fit the walls. I fit them to the sides of the floor to maximize both interior space and overall strength. They were glued and screwed in the same fashion as the floor, except that about every second screw was longer. Dwayne found some longer deck screws and invited me to use them just to be sure the walls were anchored guten'tight (like a German virgin) to the floor. I then installed two spars across the top to steady the works. I didn't put any more in yet, because I wanted to keep as much space clear as possible while I decided on the measurements for the cupboards in the galley.
 After taking a short break to go for a nice drive (see below), I installed the lower bulkhead. I became a yardstick for this step, using my own length to determine the amount of galley space I could have. I laid on the floor and stretched out to see how far aft I would need to go with the bulkhead.
 The one feature I really wanted to have in the galley is a drawer for a cooler to sit on under the counter, so that the cooler can be pulled out and opened, then re-stowed easily. Since I'm very tall, this was a challenge to incorporate into the plan (see above paragraph about the lower bulkhead). Luckily Dwayne and Tasha were nice enough to donate this great antique Coleman cooler to the cause. It's narrower and taller than most coolers, so it fit the bill perfectly. Plus it dates nearly back to the heyday of this type of camper, so I think it's a great addition.
Costs to date:
Last Total: $260
(I'm not counting the box sides since they have nothing to do with the camper)
------------------------------
(3) 3/4" plywood sheets - $89.97
(6) 2x2's - $13.62
(1) Weldbond Glue - $10.41
(1/2lb) Deck Screws - $ 2.50
------------------------------
Subt: $116.50
------------------------------
TOTAL: 376.50
Bonus

This is what kept me from the trailer all afternoon. I don't regret it one bit. Dwayne and I were feeling a bit mischievous with all the rain coming down, so we figured it was a fine time to fire up the Eagle and take 'er down to the clay pits for some muddin'
Want to see more? Click here for more photos of us and the Eagle
:-0


Just wondering if you have 2 redneck sidekicks?
ReplyDeleteWayne and Dwayne or is this a typo?